
Depending on the environmental conditions of overwatered Monstera, air humidity, and exposure to sunlight in an air-conditioned room, each plant will have different growth rates and need different amounts of water. Because we don’t have much experience, we often do not know if the soil is moist enough, plants lack water, leading to frequent watering, and plants are easily waterlogged.
In this case, if not prevented in time, it can lead to tree death. In this article, Dig Nursery will provide you with information about waterlogged Monstera, signs to recognize, and how to handle this case.
Which signs help you know about the overwatered Monstera?
Waterlogging is a prevalent condition in plants because the water supply is too much, far beyond the plant’s needs. Even when overwatered Monstera are grown in full light, there is waterlogging. Symptoms of this condition are when the leaves are light green or yellow. The young shoots are slow to develop and sometimes brown instead of green. The tree has many unusual yellow leaves, leaves that are not fresh and slightly drooping, dry edges, or yellow patches on the leaves.
When submerged, the roots cannot supply water to the upper parts of the plant. In addition, plants cannot take nutrients from the soil. It means that the plant will wither and die. Check if the tree is not producing young leaves or the branches and foliage are breaking.
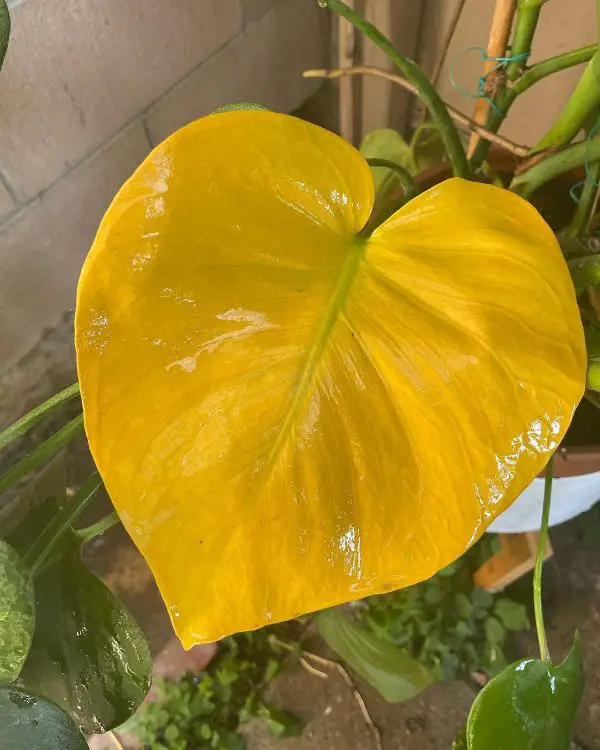
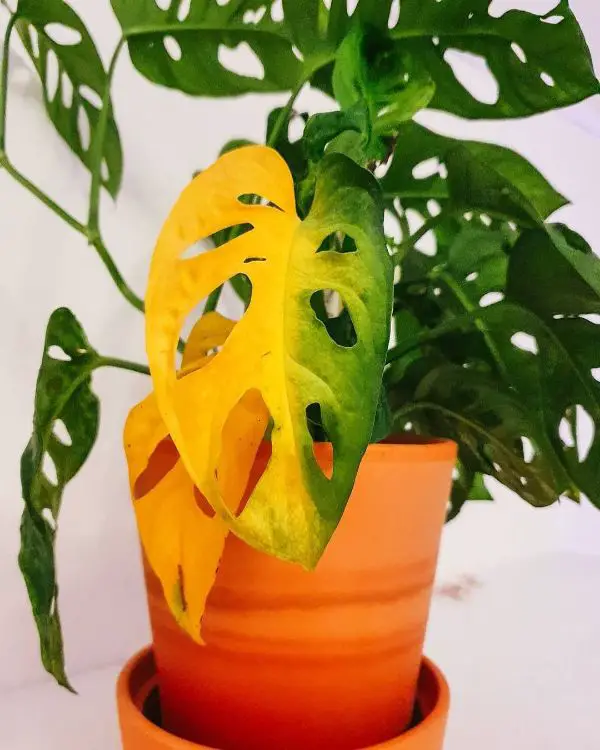
Monstera leaves turning Yellow or dark brown
Overwatering, for example, might cause your Monstera leaves to become yellow. Excess water is one of the key causes of leaf yellowing (which implies that the plant’s health is being harmed).
Excessive water removes oxygen from the soil, clogging the roots and reducing their function. If left unmanaged for an extended period of time, the roots choke, drown, and decay. Because the root system is unable to absorb water and other vital minerals, the leaves become yellow or develop dark brown patches.
You may also observe drooping leaves, which might indicate that your plant is dehydrated. It is critical to ensure that your soil dries out between waterings to avoid such incidents.
Fungi in the soil
The presence of fungus in the soil is easily detected. Fungi species occur naturally in nature (and are normally safe), but some variations may have negative impacts on your potting media and the health of your plant.
The appearance of white threads that are long and long on your soil that extend to the bottom of your Monstera is a crucial indication of fungus-related infections (you may be able to spot the presence of mold near the base of your plants)
If you feel that your potting is infected with fungi, send a sample of soil to a lab for additional testing and analysis to discover the sort of fungi damaging your plants (and how best to get rid of the infection).
The pot has a foul odour
You may notice a bad odour in the potting material. The odour is a sign of bacterial activity, which is frequently produced by overwatering, inadequate drainage, and aeration.
Bacteria can be harmful to the health of your plant. The odour is largely a sign of anaerobic respiration and oxygen depletion and deserves to be addressed.
Overwatering is the major source of foul-smelling soils and potting media, therefore remove your Monstera from the afflicted surface to safeguard its health.
Root Rot
This incident is not always visible, and it might be difficult to react quickly. Try to remember whether you were exaggerated with the water if your Monstera has a shrunken appearance with wilted leaves.
Examine the dirt. It’s fine if it’s wet, but if it’s wet for a long time, you’ll most likely find rotten, nasty, and slimy roots beneath the ground.
Wet soil is an ideal environment for fungus to spread. Fungi degrade root tissue as saprophytes, causing it to rot.
Edema
When your Monstera’s leaves have little fluid balls on them, you know it’s suffering from edema.
Edema is caused by aberrant water retention, which occurs when the strength of water absorption exceeds the intensity of transpiration.
The overwatering process causes a significant amount of carbon dioxide and the compression of carbon dioxide in the plant tissues, resulting in cells collapsing and creating lumps
Due to edema, Monstera leaves might become brown. To learn how to solve it, read this article: Why is Monstera leaves turning brown & How to Fix Them
6 Steps of taking care of Monstera when they are waterlogged
If detected early and the condition of the tree is not too severe, we can proceed to overcome it with these six steps:
Step 1: Stop watering Monstera
Stop watering the plant if you think it is waterlogged and move it into the shade to protect its leaves and stems. It is to limit the loss of water for the leaves because the roots can no longer absorb water. The top of the tree is easy to dry out if you put the plant in the sun.
Step 2: Check the soil
Gently pat around the pot wall to loosen the soil from the roots, remove the plant from the pot, and avoid breaking many of the plant’s roots. Use your hands to peel off the old layer of soil to see the roots. Gently squeeze the soil to release it from the roots. Use your hands to brush the soil gently not to damage the roots. Removing the plant from the pot is to check the roots and help the roots dry quickly.
While it’s not mandatory to remove overwatered Monstera from the pot, it’s best to do so. It will make the plant dry faster, and you can also take this opportunity to plant it in another pot with better drainage. Discard the soil if you see signs of mold or moss as it will contaminate the plant if you reuse it. Similarly, you should also throw away the ground if it smells like rotting, as it most likely contains rotten roots.
Step 3: Repotting Monstera
Leave overwatered Monstera outside the pot for a few hours or half a day before repotting the plant. When placing plants on wire mesh supports, the air helps to dry the root tips.
Read More: When to repot Monstera? How to replant houseplants
Step 4: Observe the tree’s roots and trim them
Observe the tree’s roots if the roots have brown, rotten, and smelly segments. It means that it has damaged this roof and you need to trim it. Use scissors or pruning pliers to cut off the brown, soft roots and keep only the healthy roots white and solid. If almost all of the roots have rotted, you may not be able to save the tree. However, you can try pruning the roots down to the base and replanting.
Then, you prune dead leaves and branches and cut the brown and dry branches first. If you’ve removed a lot of roots, you’ll also need to prune some healthy parts of the plant. You start pruning at the top of the tree and remove just enough leaves and branches so that the rest of the plant is no more than twice the size of the roots. If you’re not sure how much pruning is enough, just remove as many branches and leaves as the roots removed.
Step 5: Moving the plant to a new pot
Choose new planting soil with high ventilation and porosity. It is possible to line the bottom of the pot with a layer of terracotta pellets to increase drainage for the plant. Moving the plant to a pot with drainage holes and using a drip tray will prevent water from pooling around the roots and root rot. The tray will catch excess water and won’t contaminate the potting surface.
If the pot you are using has a drainage hole, you can reuse the old pot after washing the pot with mild soap to remove rotting parts of the plant, mold, and moss.
Step 6: Fill in the new soil
Place Monstera in the new pot and fill in the new soil to fill the gaps around the roots. Cover leaves if it is hot outside. It will help the leaves retain water without over-watering the earth. When the surface soil is dry, you can gently water the plant more.
Water the plant only when the top layer of soil is dry to the touch. Water moistens the soil after planting. After the first watering, you need to test the ground before the next watering to make sure the soil is dry, which means the plant needs water. When watering plants, you should water directly into the soil so that the water reaches the roots.