Pruning is necessary for maintaining the health and appearance of your plant. Fortunately, Monstera care is easy once you learn the ins and outs of how to prune a Monstera plant.
Monstera plants are epiphytes, which means they grow on other plants rather than being grown in soil. To keep your plant healthy, it must be pruned to prevent excess growth and encourage desired growth.
In this article, we’ll explain what pruning is, and why you need to prune a Monster Additionally, we’ll show you different types of pruning so you can decide which one works best for your specific type of Monstera plant.
What is Pruning?
Pruning is a technique used to maintain the health and appearance of a plant. It is a way for a gardener to rebalance their plant by removing excess shoots and branches to allow the plant to focus on a few main branches or stems. This can be done because the plant is too big for the space or it’s just ugly.
If you don’t prune your plant, it could become overgrown and possibly die. In addition, overgrown plants are less attractive than well-shaped ones. So, pruning is essential if you want your plant to stay healthy and beautiful.
It is important to know when to prune a plant. If you prune your plant too early, the plant will not have enough time to develop strong roots. If you prune a plant too late, the plant will be too weak to survive the winter. The best time to prune a plant is right when it is flowering. That is the time when each branch is fully developed and has no leaves on it.
How to Prune Monstera Plant?
Pruning your Monstera or any other houseplant is a simple task if you follow the instructions carefully. Let’s have a look at what you’ll need and the actions you’ll need to take:
What you need
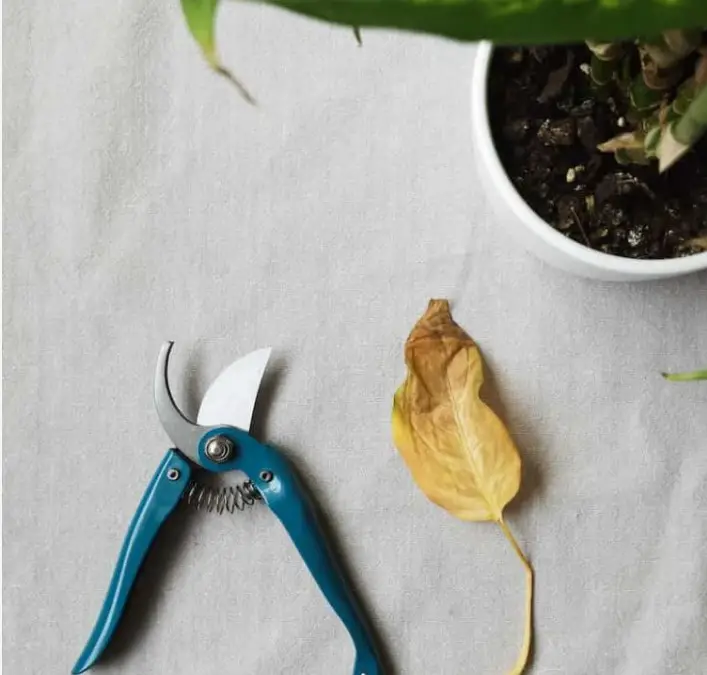
- Whether you use sharp gardening shears or scissors depends on the size of the stem you’ll be cutting. For bigger, mature stems, a gardening shear is appropriate, while a kitchen scissor is perfect for clipping damaged areas of the leaves, such as brown edges or tips.
- Because this plant contains sharp, needle-like insoluble calcium oxalates that can cause skin irritation, we recommend using gardening gloves.
- To avoid sickness transmission, clean your shears with 70–90 percent rubbing alcohol (also known as isopropyl alcohol).
Following the steps
It’s time to get down to business with the real pruning. It’s simple. However, it would be beneficial if you did so with caution. Here are a few steps to take:
Step #1: Remove any portions that are dead, dying, damaged, or sick
Using a sanitized gardening scissor or shear, cut off any dead, damaged, dying, or infected leaves as close to where they are attached to the stem as possible.
If you have a sickness, use rubbing alcohol to disinfect each time you cut. At this point, you’ll also trim any unhealthy stems or aerial roots.
Finally, if just the edges or tips of the leaf are brown, as in the case of leaf scorch, merely cut these margins rather than the entire leaf.
Step #2: Make a list of the branches you want to trim or pick which ones you want to cut
Once the dead, sick, or damaged sections have been removed, you must carefully examine the structure and shape of your plant. Next, determine where you want to cut or make a mark. Choose points that will balance your plant and give it the required appearance.
What branch or stem you choose will be determined by your objectives. If you desire a shorter, fuller plant, cut the dominating stems. Remember that the node below the cut spot will sprout additional branches.
Cut some of the lateral lanky stems if you want a more expansive, sturdy plant, on the other hand. Cut them close to the plant’s core.
Finally, when you mark or decide on cutting places, the stager will appear, resulting in fresh growth all over the plant. Don’t cut everything at the same height or level.
Step #3: Make straight cuts
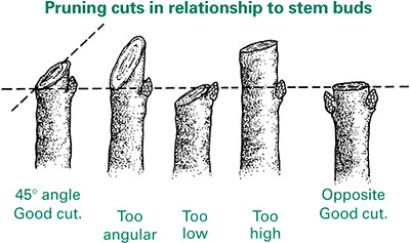
Make a clean cut on stems right above the node of the location you choose with your gardening shear or scissor. The knobby or ring-like region where leaves develop is known as the node. It’s important not to harm it since it’s where a new shoot will emerge.
You may either cut it level or follow Rutgers’ recommendation, which is to “prune 14 inch above the bud, sloping down and away from it at a 45-degree angle.” If you cut too near or too steeply, the blossom will die.”
Finally, you should never trim more than 25% of the branches at a time. It’s possible that it’ll make your plant weaker.
Step #4: Toss out what you’ve trimmed
Cut the leaves, stems, and branches off your plant if you don’t want to reproduce it. If they aren’t sick, you can compost them.
How to prune Monstera stem (Source: Rutgers NJAES)
Pruning and Its Effect on Monstera Plant Health, Growth, and Care
Pruning plays numerous functions in helping to maintain a healthy Monstera houseplant, in addition to fundamental Monstera plant care such as proper light exposure and appropriate soil.
Pruning can be done for a variety of reasons, including:
Health of Plants
Regular pruning of Monstera plants is necessary to remove any dead, diseased, infected, or dying leaves or stems.
The oldest leaves and growth on a Monstera plant will gradually wilt and die back as the plant grows. Furthermore, sections of the plant might get infected with bacteria or fungus, infested with pests, droop, or otherwise be destroyed. These sections of a plant squander important resources that may be better spent on the plant’s healthy parts.
Encouragement for New Growth
Pruning a Monstera plant fosters new development, whether you remove weakened foliage or healthy leaves and stems.
Controlling the shape and size
New growth on a Monstera will arise in the direction of the plant’s clipped sections. Cut away the top section of the plant if you want your Monstera to grow taller. Remove branches from the plant’s sides if you want it to grow broader.
Even when planted indoors, Monstera plants may grow to be extremely enormous. By clipping away leaves and stems to produce the form and size you prefer, you may assist control the size of your fast-growing Monstera Adansonii or Monstera deliciosa.
Propagation
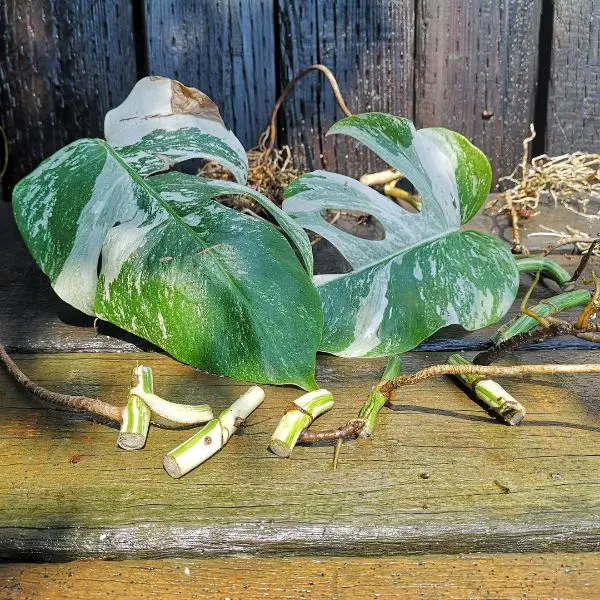
You may also trim your plant to propagate Monstera cuttings, which you can nurture into new Monstera plants. If you want to do this, make sure to clip the leaves below the nodes. These are little root-like nubs that originate from the same locations as the leaf and stem.
Read More: How to propagate Monstera – 1001 tips keeping it healthier
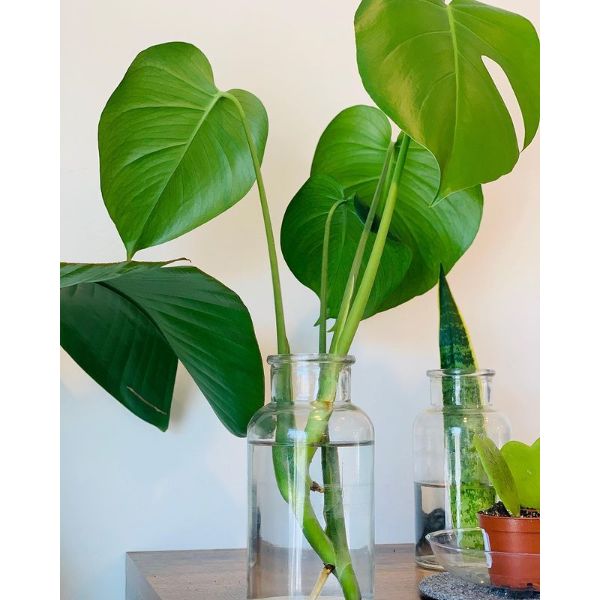
Propagation of Monstera
When Should You Prune Your Monstera?
To properly maintain your Monstera, you should prune it every winter. That is when the plant is dormant and you can safely prune it without causing damage. Some Monstera plants may benefit from pruning throughout the summer months, but be careful not to do any pruning that might damage the plant. If possible, wait until the fall to prune your plant. There are several different ways to prune Monstera: – To reduce the height of the plant and encourage more branching. – To remove excess growth and encourage branching. – To remove excess growth and encourage more dense foliage growth.
Is it necessary to prune aerial roots?
Whether or not to prune Monstera aerial root is a matter of personal preference. You have the option of leaving them alone, tying them to the climbing pole, or directing them to the ground.
Others immerse them in water. We don’t encourage it since they risk overwatering the plants because they have a backup supply of water.
Taking Care of Your Monstera Plants After Pruning
You don’t need to do anything specifically after cutting your plant. Continue to water your Monstera plant in the same manner as before.
Because your Monstera is likely to be in the season of growth when you cut it down to its desired size, you should give it a balanced fertilizer for tropical houseplants at intervals of 2-4 weeks throughout the summer months at this time.

