Do you have a Monstera Adansonii plant that you love, but can’t seem to keep alive? Or maybe you’re just looking for an easy way to propagate more of these beautiful plants? Well, you’ve come to the right place! This blog post will discuss how to propagate Monstera Adansonii plants using two different methods. We will also provide tips on caring for your new plants. Let’s get started.
How to propagate Monstera adansonii
There are two main methods for propagating Monstera Adansonii plants: stem and leaf cuttings. We will discuss each method in more detail below.
- Stem Cuttings: To propagate using stem cuttings, you must take a cutting from an existing plant. The cutting should be about six inches long and include at least two leaves. Once you have your cutting, you will need to remove the bottom leaf and then place the cutting in a glass of water. Make sure that the water is fresh and that it is changed every few days. After a few weeks, you should see roots beginning to form. Once the roots are about an inch long, you can transplant the cutting into a pot with well-draining soil.
- Leaf Cuttings: Leaf cuttings are a bit more difficult to propagate, but they can be done! To start, you will need to take a leaf from an existing plant. Once you have your leaf, you will need to cut it into two or three pieces, ensuring that each piece has a bit of the stem attached. You will then need to place the leaf cuttings in a glass of water and wait for them to form roots. This can take anywhere from four to eight weeks. Once the roots are about an inch long, you can transplant the cuttings into a pot with well-draining soil.
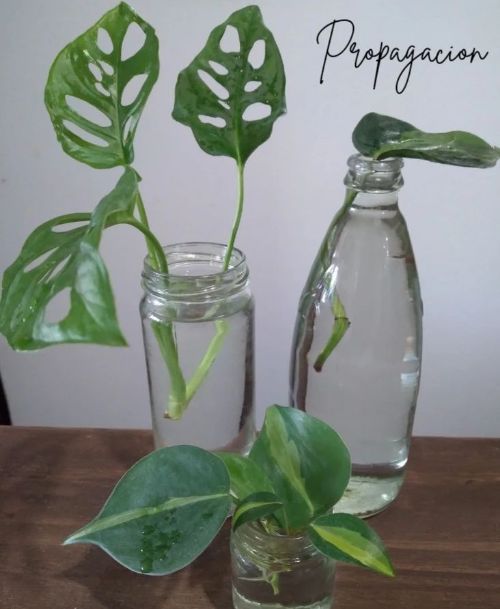
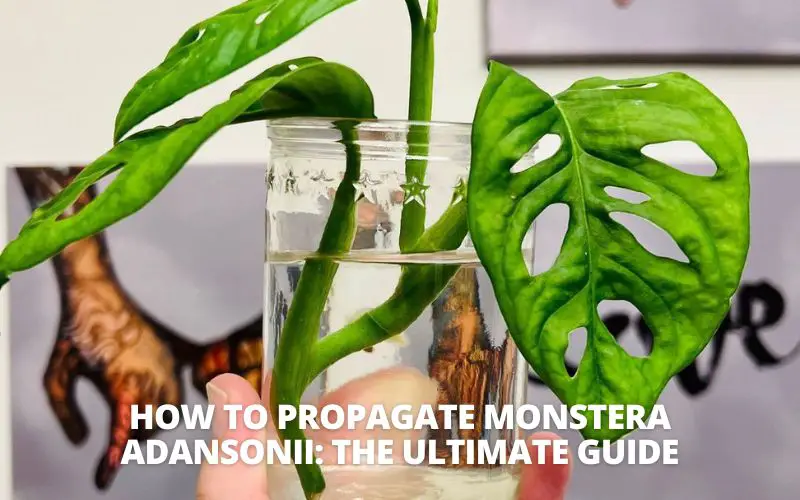
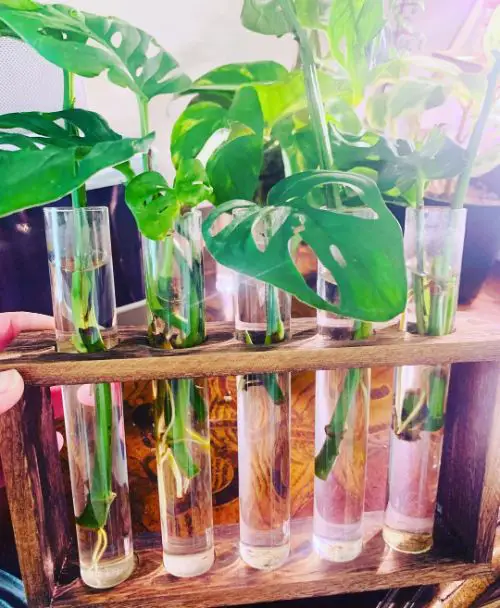
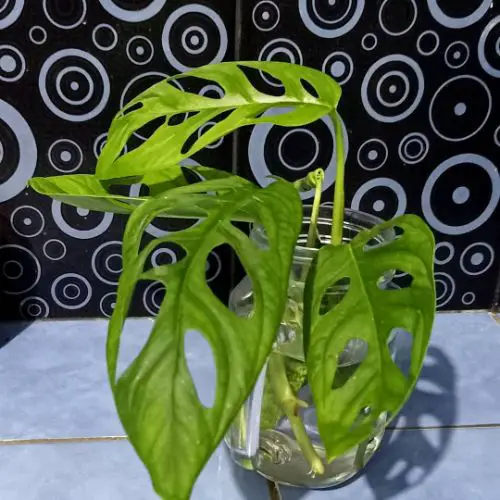
Monstera Adansonii propagate in water
The most effective way to multiply a collection of Monstera Adansonii plants is probably by water propagation. We tend to favor it because the transparent glass of my propagation jars allows us to easily see how quickly the roots on our babies are growing. Here’s how to grow a fully propagated plant in water from basic stem cuttings:
- Use the method explained above to create your leaf and stem cutting. Once you have your cutting, you will need to remove the bottom leaf and then place the cutting in a glass of water.
- Clean water should be put into a glass jar or sterilized vase. The size of your cutting may affect the container’s volume.
- Your new cutting should be placed upright in the jar and exposed to indirect light.
- Over the next two to four weeks, keep an eye on your Monstera Adansonii cutting. Every week or so, cleanse the roots of any accumulated filth by replacing the water in the jar with clean, room-temperature water.
- It’s time to plant once the roots have fully formed (we prefer to wait until they are 4-5 inches long). The cutting should first be placed in a pot prepared with your preferred nutrient-rich potting mix.
- After giving your new Monstera Adansonii a week of regular watering, stand back and watch it flourish!
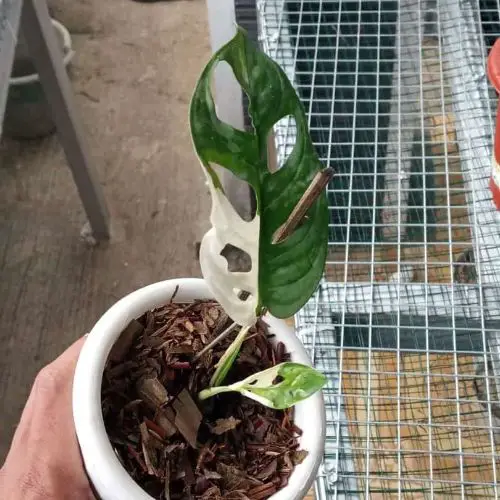
Monstera Adansonii propagation in soil
- Your preferred potting mix should be added to your chosen pot. The soil should then be completely saturated with water, ensuring proper drainage.
- Get ready to cut.
- Plant the stem of your cutting in the pre-wetted soil without burying any leaves, ensuring that at least one node is wholly covered.
- Place the newly planted cutting close to a source of indirect light, and keep the soil evenly moist but not soggy. Its roots ought to have grown sufficiently in two weeks to tolerate routine maintenance.
Monstera Adansonii propagate in moss
The last method of propagation encourages new roots to form on a stem before you cut it by covering it with sphagnum, a type of peat moss. This cutting-edge technique, also known as air-layering, can successfully generate brand-new, robust Monstera Adansonii.
- Locate a suitable node on a stem of the parent plant of your choice.
- Make a small cut into the stem with your sharp knife about an inch below the node. You only need to create a wound for the plant to get a signal to produce new roots; avoid cutting all the way through.
- Sphagnum moss that has been dampened should be wrapped around the incision and node, and the wrapping should be tied with string.
- The bundle of moss should now be loosely wrapped in a little plastic wrap. To allow oxygen to reach the moss, poke a few holes in the plastic.
- Gently unwrap the package, then water the moss to keep it nice and moist. Now the waiting game begins!
- The node inside your moss bundle should begin to grow new aerial roots after a few months of consistent maintenance. They will be prepared for cutting once they are several inches long.
- Use your sharp shears to cut the stem from the plant well below your new roots after removing the plastic and moss for good.
- Enjoy your new Monstera Adansonii plant by planting it in a pot prepared with damp soil.
You might also like: How to train Monstera Adansonii to climb? All things should do
How Long Does Monstera Adansonii Take to Grow?
- Water propagation: The time frame for roots and new leaves might range from a few weeks to several months.
- Soil propagation: After you plant your Monstera Adansonii node cuttings, it usually takes one to three months before the swiss cheese vine begins to show any signs of development.
- Moss propagation: After being air-layered, it will take two to three weeks to a month before you notice any root development.
How to take care of a Monstera Adansonii Propagation
Once you have successfully learned how to Propagate Monstera Adansonii, you will need to care for them properly to keep them alive.
Temperature
The Monstera Adansonii grows successfully at the same temperatures as a fully mature specimen. Your propagated plant should be kept between 64 and 81 degrees Fahrenheit (18 and 27 degrees Celsius).
Never store newly propagated Monstera Adansonii at temperatures lower than 18°C (64°F). Your plant’s growth will be halted, and it can die.
Light
Light Be sure to offer bright, indirect sunshine for your newly propagated Monstera Adansonii. Even “grow lights” can be used to generate the ideal illumination for your plant.
Until the plant has fully grown, keep it out of direct sunlight. Several hours of direct sunshine won’t harm a fully developed Monstera Adansonii, but newly propagated Monstera Adansonii won’t fare well.
To know the amount of light required for Monstera, read this article: Monstera adansonii light requirements: How much they need
Humidity
Keep your Monstera Adansonii in a humid environment with a humidity level of at least 60%. For this plant, a humidity level of 90% is ideal, however, this is challenging to obtain indoors.
A humidifier can be used to facilitate this process. However, you can use a tray and fill it with water and stones if you cannot buy one.
The humidity level around your Monstera Adansonii will rise once the water evaporates.
Fertilizer
If you have grown your Monstera Adansonii in water, you must fertilize it each time you change the water.
On the other hand, if you planted it in soil, fertilizing it once a month in the spring and summer will be sufficient.
Use a 20-20-20 NPK ratio at all times. It can be applied as a slow-releasing fertilizer or liquid fertilizer.
Soil
Monstera Adansonii requires well-draining soil to prevent its roots from rotting. Orchid bark, charcoal, peat moss, and perlite are all ingredients you may use to make this soil that drains well.
Additionally, you must watch out that the pH level does not rise above 7.0. Maintaining a pH between 5.5 and 7.0 is ideal.
Some reasons why Monstera Adansonii propagation not working?
Your Monstera Adansonii propagation may not be successful for several reasons.
The first reason is that the cutting may have been stressful
Because it was done outside in chilly conditions (or inside with too much of a cold draft), or because of the wait for delivery if you purchased online.
Before assuming that there is a problem with propagating, stress can fail, thus, this must be ruled out.
A fungus will bring on the second reason if you are sure cutting is healthy
If this occurs, it typically manifests as pale or yellowing leaves on your plant and can soon spread throughout. If you see this, remove the brown or yellowed areas and put the healthy stem(s) that are still present in a new container of water.
A clear vase or jar might not be the best receptacle for your clippings; an opaque one might work better.
Warm living conditions are more vital than direct sunshine at this stage of life. So you could attempt this.
Additionally, propagation occasionally fails. We constantly advise spreading multiple stems (at least three or more) so that at least one will always succeed.
Now that you know how to propagate Monstera Adansonii, it’s time to start. Remember to use a potting mix that drains well and water sparingly until the plant is established. You should also fertilize with a balanced liquid fertilizer every month or two. With a little TLC, your new Monstera will thrive and grow into an impressive specimen in no time at all. Have you propagated Monstera Adansonii before? What tips would you add?